
TL;DR
Moving your rig into a closet or separate room dramatically cuts noise, especially if you seal gaps and add proper ventilation. Acoustic foam helps with echoes, but soundproofing hinges on blocking and decoupling. Good placement and thoughtful treatment make tiny spaces work.
Ever try to record vocals or run a high-power AI rig in your closet? You’ll notice the sound bouncing around, echoing like a tin can. But the real game-changer isn’t just slapping foam on the walls—it’s moving the noise away altogether. The secret is in where you place your gear and how you treat that tiny, reflective space.
This guide breaks down how to turn a cramped closet into a quiet, effective workspace. You’ll learn why distance beats absorption, how to prevent heat buildup, and what tricks make small rooms less echoey and leaky. Ready to ditch the noise and get professional-quality sound? Let’s dive in.
Acoustic dampening
& the rig in the closet.
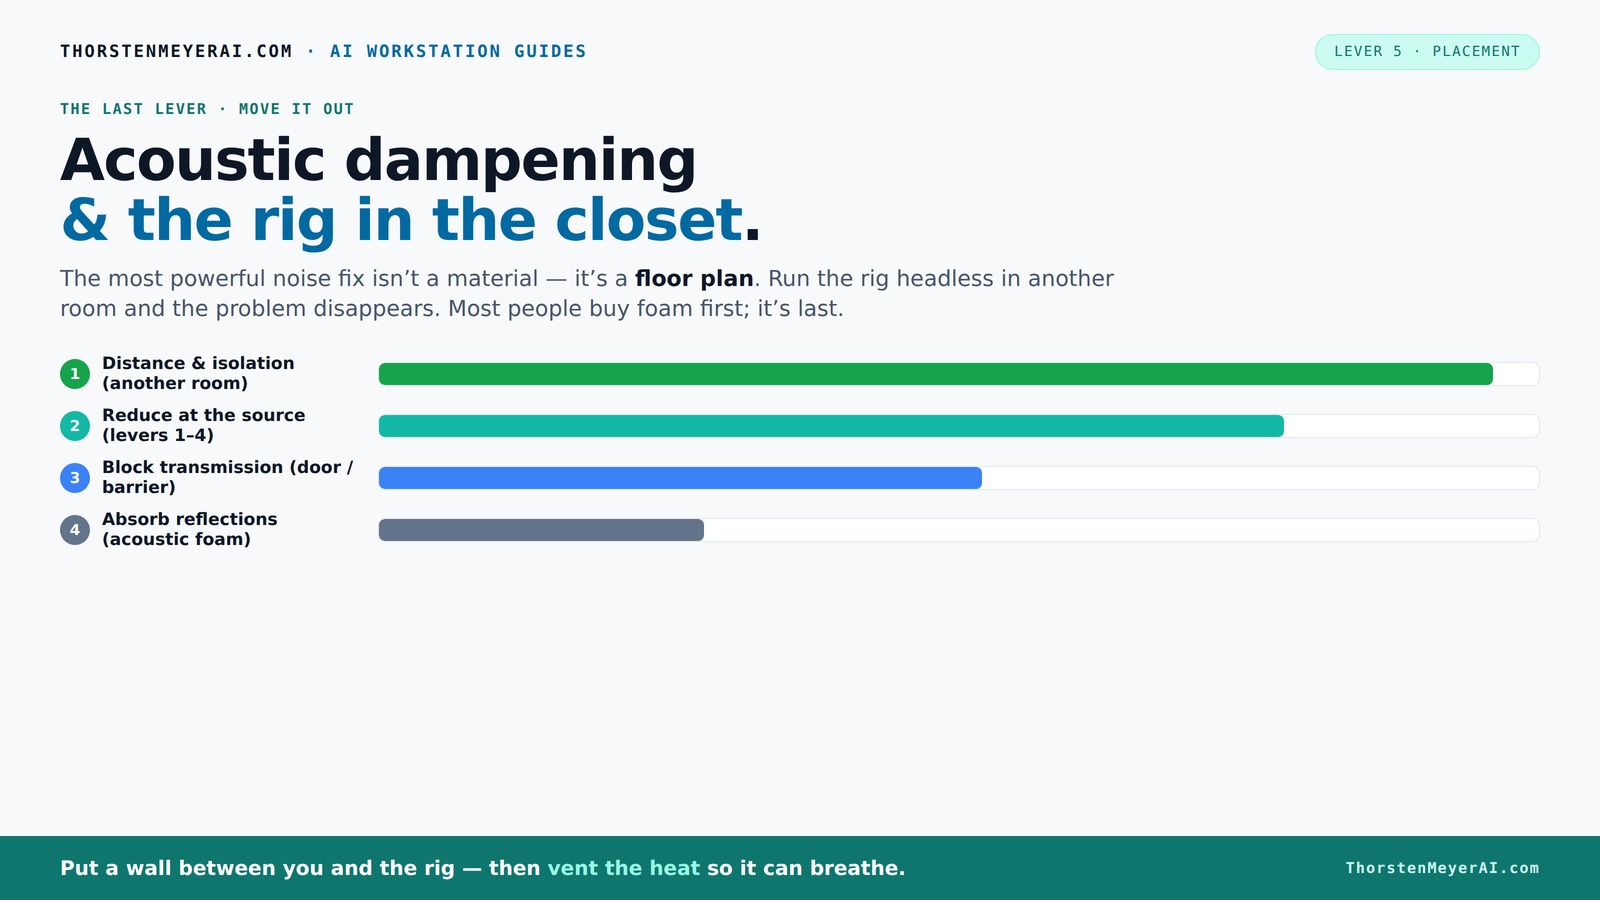
The most powerful noise fix isn’t a material — it’s a floor plan. A rig you can’t hear because it’s in another room beats any amount of foam. Tap the approaches in Part 1 to see what actually works.
(another room)
(levers 1–4)
(door / barrier)
(acoustic foam)
Contain the noise, not the heat
Key Takeaways
- Moving your rig into another room or closet reduces noise more than any foam treatment.
- Ventilation is critical—sealed spaces trap heat, risking hardware damage and noise from thermal throttling.
- Placement of acoustic treatments at reflection points beats random coverage—focus on where sound bounces into your mic.
- Sealing gaps around doors and cracks is essential to prevent sound leaks; foam alone won’t do it.
- In small spaces, bass traps and floor treatments help prevent low-end boom and echo, making your recordings clearer.

Focusound 52 Pack Acoustic Foam Panels 1" x 12" x 12" Sound Proof Foam Panles Soundproofing Noise Cancelling Wedge Panels for Home Office Recoding Studio with 300PCS Double-Side Adhesive
- Soundproofing Design: Triangular grooves for noise absorption
- Includes Adhesive Tape: 300pcs double-sided adhesive for easy installation
- Easy Shape Recovery: Soak in water to restore shape within 48 hours
As an affiliate, we earn on qualifying purchases.
As an affiliate, we earn on qualifying purchases.
Why Moving Your Rig Beats Endless Foam Padding
Think of noise reduction like a game of avoid-the-sound. The biggest win? Distance. Moving your rig into another room or closet makes sound transmission vanish. Your laptop or mic won’t hear the GPU’s roar if it’s in a different space. A wired connection or strong Wi-Fi keeps you connected, while the rig stays out of your earshot. Explore sleep and soundproofing tips.
If you’re running a GPU tower that hits 600W of heat, the real issue becomes airflow. Without ventilation, heat builds up fast, causing fans to scream and throttling to kick in. So, relocating isn’t just about quiet—it’s about keeping your hardware happy with proper cooling. By distancing your equipment, you’re not just reducing noise; you’re also preventing overheating and potential hardware damage. The tradeoff is needing to manage longer cables or network setups, but the payoff in quieter, safer operation is often worth it.
How to Use a Closet as a Quiet, Cool Rig Space (And Why Ventilation Matters)
Placing a hot, noisy machine in a closet is a smart move—if you handle airflow right. The key? Ventilation. A simple passive vent can help, but a quiet exhaust fan makes a world of difference. These fans pull out hot air and bring in cooler, fresh air, preventing heat from trapping inside. Learn about proper acoustic dampening and ventilation.
Understanding why ventilation matters is crucial: without it, heat accumulates rapidly, causing components to overheat. Overheating not only risks hardware damage but also triggers thermal throttling, which leads to increased fan noise and reduced performance. Proper ventilation ensures your rig stays at optimal temperatures, maintaining both performance and silence. The tradeoff involves installing ducting or fans, which adds complexity but significantly improves the environment. A well-ventilated closet becomes a mini data center—quiet, cool, and efficient.
The Art of Acoustic Dampening in Small, Reflective Spaces
Acoustic dampening isn’t about turning your closet into a studio — it’s about taming reflections and reverb. Small spaces tend to develop standing waves and low-frequency buildup, especially with parallel walls. Heavy blankets, foam panels, and thick curtains absorb sound bouncing between surfaces. Discover effective acoustic dampening techniques.
Placing treatment at reflection points—like behind the mic or on the ceiling—is critical because these are the places where sound waves bounce directly into your microphone, creating coloration and echo. In corners, low-end frequencies tend to concentrate, causing muddiness. Bass traps in these spots help absorb these problematic frequencies, preventing them from overwhelming your recordings. Rugs or carpets on the floor also absorb reflections and reduce echo. Think of it as padding a boxing ring—less bounce means cleaner sound. The tradeoff is that over-treating can make the space feel muffled or dead, so balancing absorption with some openness is key.
The Secrets to Soundproofing a Closet—What Works and What Doesn’t
Soundproofing a small closet isn’t the same as soundproofing a room. It’s about sealing gaps, adding mass, and decoupling surfaces. Weatherstripping doors, sealing cracks, and using dense barriers block most leaks. Acoustic foam and blankets help with internal reflections, but don’t stop sound from escaping through cracks. Read about effective soundproofing methods.
Understanding why this matters: sound leaks are often caused by small gaps or weak points—like door hinges or ventilation openings—that allow sound to escape. Sealing these gaps with weatherstripping or acoustic sealant creates a barrier that significantly reduces noise transmission. Adding mass—such as dense panels or mass-loaded vinyl—further prevents sound from passing through walls or doors. Decoupling surfaces, like mounting panels with isolation mounts, prevents vibrations from traveling. The tradeoff involves effort and cost; perfect soundproofing is expensive and complex, but targeted sealing and mass addition can dramatically improve your space without a full renovation.
Placement Tips: Where to Put Foam, Panels, and the Microphone
Placement is king when it comes to tiny studios. Start with the microphone—aim it away from the reflective wall behind it, and treat the reflection points near it first. Foam panels should be spaced a few inches from the wall to increase absorption, especially behind the mic and on ceilings. Explore wellness and acoustic comfort tips.
Cover the corners with bass traps if low-end buildup becomes noticeable. Remember, in tiny spaces, the first reflection points are often the biggest contributors to echo. Proper placement reduces the likelihood of comb-filtering and phase issues, which can cause your recordings to sound hollow or distant. Think of it as directing the sound waves to be absorbed where they bounce the most—this targeted approach yields cleaner, more professional results. The tradeoff is that improper placement can lead to dead spots where sound isn't absorbed effectively, so testing and adjusting is essential.
How Much Wall Coverage Do You Really Need?
More isn’t always better, but in small closet booths, coverage can make a difference. Aim for at least 25-50% wall coverage with foam or panels, focusing on reflection points. In many cases, covering the wall behind the mic and the ceiling yields the biggest improvements.
In tight spaces, corners are tricky. Bass traps can help prevent low-frequency buildup, especially if you notice a muddy or boomy sound. Don’t forget the floor—adding a rug or carpet cuts down on floor reflections. The goal is to strike a balance: enough coverage to tame reflections without deadening the room entirely, which can make recordings sound unnatural. The tradeoff involves cost and space; excessive treatment can also absorb too much high-end, dulling your recordings.
Can You Truly Soundproof a Closet or Just Make It Less Echoey?
Most closet setups are about reducing echo, not total soundproofing. Complete soundproofing involves sealing gaps, adding mass, and decoupling surfaces—costly and time-consuming. Instead, aim for a quieter, less reflective space.
Sealing cracks around doors, using heavy blankets, and blocking leaks with weatherstripping can drastically cut sound leaks. It’s about making the space less 'boxy' and echoey, not silent. Recognizing that absolute soundproofing is often impractical helps set realistic expectations. The main goal is to minimize the transmission of loud sounds outside the space and reduce internal reflections, creating a more controlled environment for recording or AI work. The tradeoff is that some sound may still escape, but with strategic sealing and treatment, you can achieve a significant reduction in noise and echo.
The Tiny Space Setup: How to Make the Most of Your Closet
In tiny closets, every inch counts. Use foam panels at reflection points, hang blankets on walls, and place the mic at least 6-12 inches from reflective surfaces. Keep the airflow clear with a small vent or fan, and always seal gaps around the door.
For example, a creator used moving blankets and foam behind a closet door, then placed a foam panel directly behind the mic, transforming a cramped space into a surprisingly effective vocal booth. The key is understanding that strategic placement and minimal treatment can often outperform overbuilding. By focusing on reflection points and sealing gaps, you maximize your limited space’s potential. The tradeoff is that over-treatment can deaden the sound too much, so aim for a balanced setup that preserves some natural room tone while controlling reflections.
Frequently Asked Questions
Is acoustic foam enough for a closet studio?
Acoustic foam reduces echoes and reverb inside the space but doesn’t block sound from leaking out. For true soundproofing, you need to seal gaps and add mass. Foam alone is a good start but not the full solution.Where should I place foam or panels in a closet?
Start with reflection points near the mic—behind it, on the ceiling, and on side walls. Covering corners with bass traps helps low-end issues. Remember to leave a few inches between foam and the wall for better absorption.Should the mic face into the closet or toward the door?
Aim the mic away from reflective surfaces behind it—point it toward the least reflective part of the space. Placing the mic slightly off-center reduces bounce and captures cleaner sound.How do I stop sound from leaking through the door?
Use weatherstripping, acoustic sealant, or blankets over the door. Sealing gaps around hinges and handles also helps. For serious setups, consider a solid door with soundproofing material.Do I need bass traps in a closet booth?
If you notice a muddy or boomy sound, bass traps at the corners can tame low-end buildup. In smaller spaces, they’re often a game-changer for clearer recordings.Conclusion
Turning a closet into a quiet, effective workspace isn’t about endless foam or pricey soundproofing. It’s about smart placement, sealing leaks, and providing proper ventilation. When you treat the space right, the noise becomes a non-issue—your gear roars in peace, and your recordings sound professional.
Think of your closet as a tiny studio canvas—paint it with the right techniques, and it’ll perform better than a fancy room filled with echoes. Your best move? Focus on moving the rig away, sealing gaps, and making sure heat can escape. Quiet, cool, and ready for action.